What is a thermocouple wire? Thermocouple wires are a special wires that are made up of two dissimilar metals that when coupled together will generate a voltage signal in response to a change in temperature where it is exposed to.
Thermocouple wires are widely used mostly in all fields of a processing or manufacturing plants whether directly or indirectly (permanently installed or used just a probe) used in a process.
I usually see thermocouples used in equipments and devices like Oven, chambers, liquid baths and surface metal plates to measure and monitor temperatures. Their ability to be deformed, routed and shaped in different ways are some of its characteristics that makes them a good choice as a temperature sensor.
Regardless how it is used, thermocouple wires should be calibrated and checked for physical damage or any deteriorations, because these can cause errors and out of tolerance measurement results.
This procedure is applicable to all types of thermocouples but we will concentrate only on type K for this presentation.
In this post, I have presented 2 calibration methods for themocouple wires:
1. Method 1: Open and Welded End theromoucple wires
2. Method 2: Both Ends Open thermocoupe wires
Objective:
To define verification procedure Of thermocouple wires or probe using a Metrology Well As the reference standard and Fluke 754/1524 as the indicator.
Calibration Method 1: For Open and Welded End Thermocouple wire
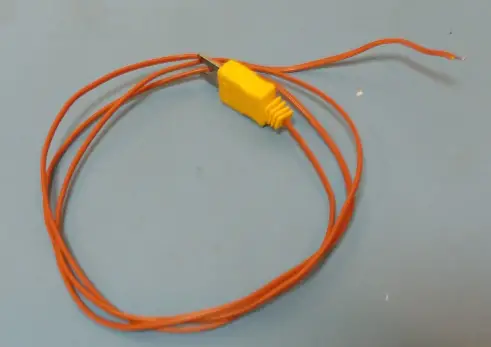
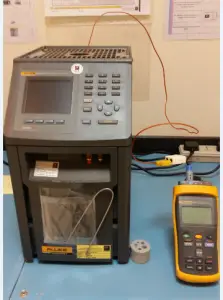
This is for a thermocouple with an open and welded end. This is accomplished by comparing the simulated temperatures generated from Metrology Well, which is the reference standard. The wire or probe is inserted on the Metrology Well where the Unit Under Calibration (UUC), is being compared to.
Requirements:
- Warm-up time (UUC): At least 1 hour for proper stabilization
- Temperature: 23 +/- 5 deg C
- Humidity: 50 +/- 30%
- Perform 3 test points for each range
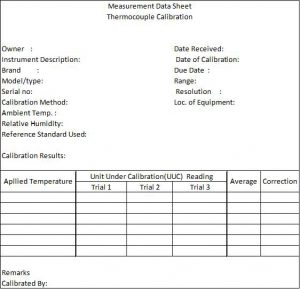
- Measurement Data Sheet (MDS)
Reference Standard and Equipment:
- Fluke Metrology Well
- Thermohygrometer – for environment monitoring
- Fluke 1524 – for display
- Cleaning materials
Calibration Procedure:
- Observe proper care and safety, Metrology Well generate a high temperature which can cause burn and damage.
- Check the thermocouple wire for any visual defects that can affect its accuracy. Discontinue calibration if any defect is noted.
- Clean the thermocouple wire with a soft cloth.
- Prepare the measurement data sheet (MDS) and record all necessary details or information ( Brand, Model, serial #, etc).
- Determine the range of the thermocouple wire or the user range ( an example is from 250 to 700 deg Celsius), choose at least 5 test point.
- Turn on the Well and set to the desired temperature, starting from low to high temperature.
- Once the temperature of the Metrology well has stabilized, carefully insert the welded end of the thermocouple on the holes in the well. There are different sizes of holes so choose the one that fits properly to ensure maximum heat absorption and accuracy.
- Then insert also the open end with a connector to the indicator and set the required thermocouple type which is type K.
- Wait for the display to stabilize ( approximately 10 min) then get the reading. Record readings on the MDS.
- Continue steps 4 to 7 until all ranges are finished.
- Check readings if within the accuracy defined by the manufacturer, for type K , accuracy = +/-(0.75%) of reading.
- If the readings are already within limits update the corresponding record, do labeling and sealing and issue to the owner, otherwise, do necessary repair or adjustment.
For Thermocouple calibration set-ups, visit my other post here >> 3 Set-ups for Thermocouple Calibration
Calibration Method 2:Both Ends Open Thermocouple Wires .
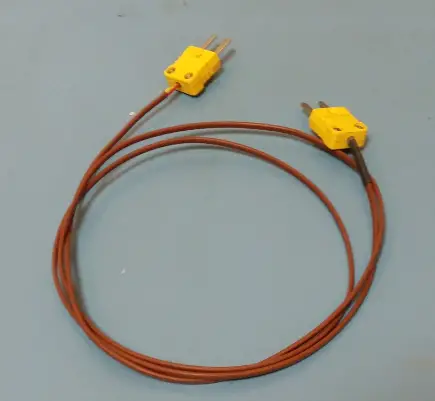
This is for a thermocouple wire with both ends open. Calibration is accomplished by comparing the simulated temperatures generated from Fluke 5522a calibrator, which is the reference standard, to the display of the indicator ( Fluke 754 or equivalent), where the Unit Under Calibration (UUC) is connected
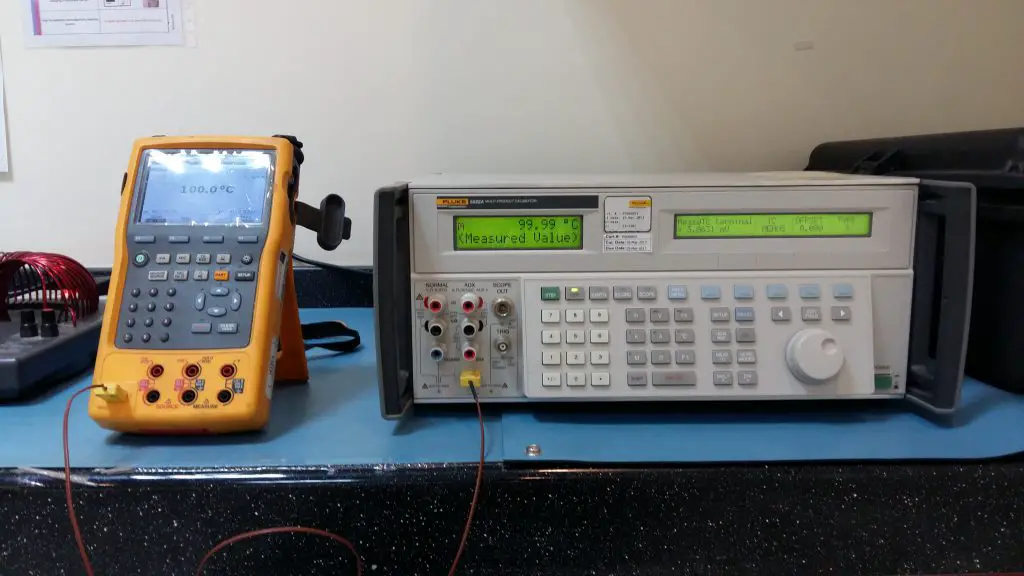
Requirements:
- Warm-up time (UUC): At least 1 hour for proper stabilization
- Temperature: 23 +/- 5 deg C
- Humidity: 50 +/- 30%
- Measurement Data Sheet (MDS)
Reference Standard and Equipment:
- Fluke 5522a calibrator
- Thermohygrometer – for environment monitoring
- Fluke 1524 or Fluke 754- for display
- Cleaning materials
- Connector/adaptor
Calibration Procedure:
- Allow the temperature of the UUC to stabilize at room temperature.
- Check the battery and fuse of the indicator, replace if necessary.
- Record necessary details on the Measurement Data Sheet (MDS)( Brand, Model, Serial, etc.)
- Check for any physical or functional defect , discontinue calibration if defects are noted. Inform owner immediately.
- Clean the thermocouple wire with a soft cloth.
- Determine the range of the thermocouple wire or the user range ( an example is from 250 to 700 deg Celsius), choose at least 5 test point.
- Turn on the Fluke 5522a calibrator and connect the thermocouple as shown in the Figure.
- Select the thermocouple type on the menu of the calibrator( Fluke 5522a) and indicator (Fluke 754)
- Enter desired temperature values, wait for the display to stabilize ( at least 1 min for every setpoint) then get the reading. Record readings on the MDS.
- Continue steps 8 to 9 until all ranges are finished.
- Check readings if within the accuracy defined by the manufacturer, for type K, accuracy = +/-(0.75%) of reading.
- If the readings are already within limits update the corresponding record, do labeling and sealing and issue to the owner, otherwise, do necessary repair or adjustment.
- end.
Please visit Thermocouple Calibration Setups for additional explanations.
Thank you for visiting my site, please share and comment.
Edwin
23 Responses
Jhamiea al khathani
Do u have any conversion table for Type k From Temperature to millivolts?
Edwin
Hi Jhamiea,
Thank you for visiting. You may check and download this pdf at this site.http://www.omega.com/temperature/Z/pdf/z204-206.pdf
Hope this solves your querry.
best regards,
Edwin
edsponce
I Just received a comment regarding a thermocouple that has a burned insulation after it was soaked in a metrology well with a 450 deg C temperature for calibration.
Below are my responses. Hope that it would add additional information.
________
Below are the reasons why your thermocouple insulation was burned:
1. Thermocouple insulation is not designed for the temperature you are using. Some insulations can withstand only upto 150 deg C. Look for a braided type ( or other types) insulated thermocouple wire.
2. Check the type of thermocouple you are using and verify its temperature range. Most Thermocouple can measure upto 1000 Deg C but it is dependent on its insulation and thickness of the wire.
3. Check how the thermocouple is being used in your process, some thermocouples are used as a surface sensor so the procedure for calibration is not matching. check other related procedure here in my blog.
4. You may use an extension probe as the main sensor to be inserted in the metrology well.
Extension probe is a sensor probe to be connected in the thermocouple which is almost similar to a solid metal bar.
HOpe this help.
Best regards,
Edwin
md ahamad
Hi
can i know the calibration frequency of thermocouple bacouse as i seen in ASME standard there is no any electrification regarding validation plase send me the standard code and reference
edsponce
Hi Mr. Ahamad,
Thank you for visiting my site. Calibration frequency, as far as I know, it has no standards set to be followed. Most calibration frequencies are suggestions and recommendations. These suggestions and recommendations are based on the experiences of most users. I experienced about thermocouples having a calibration frequency starting from 3 months going 6 months to 1 year.
But this is based on how the thermocouples are used, the quality of the thermocouples and many other reasons. And all of these must be properly documented. Please check the below guide about this.
Please check this standard from GSO. GSO OIML D 10:2010 – Guidelines for the determination of calibration intervals of measuring instruments.
Regarding the validation, this is based on company policy or procedure, there should be a planned or scheduled execution of validation and/or verification. You may check ISO 9001:2015 under clause 7.1.5 and ISO 17025:2017 Clause 7.7 related to monitoring the validity of results.
I hope this helps.
Edwin
M. Saleh
Hi,
If the client requests a zero test point for TC calibration, can I use an ice dewar flask for this application?
Thanks
edsponce
Hello Saleh,
Yes, you can. It is the most acceptable method for a Zero Degree fix point calibration for a thermocouple and other temperature measuring instruments.
Thanks for reading my post.
Best regards,
Edwin
Cyrel Garcia
Sir,
Good day.
Although i know that TC wire should be calibrated, May I ask which Reference Standard specs can i see the requirement for the Thermocouple wire calibration especially Tip welded type.
I there any specs that says that if i have a short TC wire (<2ft) it is ok not to be calibrated.?
thank you in advance for your reply.
edsponce
Hi Cyrel,
You can use EURAMET cg-8 as a guide to calibrate thermocouples especially tip welded type. This is a free guide in Euramet site.
I am not aware of a spec that states a shorter length of TC does not need calibration. This part of the assessment depends on the user. On how you can prove that the short TC does not need calibration.
One assessment or technique that I recommend is that, if the thermocouple wire is integrated with the indicator and it is calibrated as one during the calibration process, it does not need calibration. Integrated means that you only use that TC on a dedicated indicator. But if you remove and transfer to other indicators, then it is not considered integrated or as one.
I have a post regarding my experience on how to assess if an instrument does not require calibrations. You may check in this link>> calibration-not-required
I also included a cheatsheet that you can use to guide you for the assessment.
The techniques I shared works for me during my in-house calibration management and I hope It can work also for you as well.
Thank you for reading my post.
I hope this helps.
Edwin
Thinh Le ngo dong
Hello,
I would like to calibrate my welded TC wire by fluid bath, if i immerse TC directly into liquid, Does it effect badly to results or TC itself?
To avoid contacting to liquid, I put TC in a tube with tiny sand then immerse tube into liquid bath. Calibration results is acceptable? Could you give me some advices?
Thank you very much.
Thinh Le ngo dong
in this case , i put both reference and TC in tube together.
edsponce
Hi Thinh Le ngo dong,
I believe it is ok because both the reference and TC are in the tube together. You just need more time to stabilize.
Best regards,
Edwin
edsponce
Hi Thinh Le ngo dong,
Just want to know, are you a 3rd party calibration lab?
I did not try yet inserting the TC in a tube with sand so I cannot comment on this. But if contamination is not a problem, you can just insert or immerse the TC directly into the liquid. See to it that it does not touch the bottom and the sides.
The standard method is that you will use only the liquid bath as the heat source then use another standard thermometer as the standard, the probe of the standard thermometer is also immersed in the liquid together with the TC. Try to download the Euramet guide, the EURAMET cg-8. This is free in their website.
I hope this helps. Thanks for visiting my site.
Edwin
Thinh Le ngo dong
Thank you for your reply.
I am in a calibration lab, i am going to develop a new method of TC and RTD calibration. To TC i can immerse in liquid, but RTD PT100 i can not cause it could be damage . So i use tube and sand as i said above. Someone said that “you can immerse PT100 to the depth of inox shield”,but some shields are short, only 10-20mm.I think it is not good. Can you give me some advise?
Thank you!
edsponce
Hi Thinh Le ngo dong,
I only have experience using a liquid bath for RTD that is directly immersed in the liquid bath, so I cannot comment further about a good type of shielding.
You can try a metal insert that will fit exactly with the RTD but you need to include axial uniformity in your uncertainty budget or look for a liquid bath that will not react and damage your RTD.
Good luck with your method validation.
I hope this helps.
Best regards,
Edwin
Vanessa Manalo
hello Sir. I just want to ask about our Data Logger, it has 8 temperature probes. however our procedure for calibration of incubator need/requires 9 points, with the 9th one to use the Data Logger itself to measure the temperature. But, the 9th point (which is the Data Logger itself) is not calibrated, so the temperature that it reads is questionable, (based on our previous audit). do you think it is correct to use that as the T0 for our calibration, or shall we use another logger for that purpose. Thank you!
edsponce
Hi Vanessa,
The thermologger regardless of how many probes it has should be calibrated. This is your reference standard therefore it should be calibrated, not just for traceability but also to determine any errors for possible corrections.
I hope this helps,
Edwin
Vanessa Manalo
Thank you Sir for your reply, understood on this point. My follow-up question is that, we have this data logger OctTemp2000 Data Logger (MadgeTech) and it can only attach 8 probes. However, our procedure for closed chamber calibration requires 9 points and as per procedure, the 9th point will be measured by the data logger itself (where the 8 probes are attached). Do you think this is applicable? It became our finding because the data logger itself is NOT calibrated but the 8 probes that is attached to it is calibrated. I have asked some calibration laboratories but they said usually the data logger itself shall not be used as measuring device just use as internal channel compensation. So, what thermometer can we use for the remaining one point? Thank you very much!
edsponce
Hi Vanessa,
I did not try that setup yet but for me, yes, it is applicable, I don’t see any problem, you can transfer one of the probes to the location of the 9th probe then re-run the test. The problem I see is that the themo-logger must also be calibrated. It should be calibrated with the 8 probes. The logger can be used as a measuring device as long as it meets the required accuracy for the job (an example is the 4:1).
You need to purchase a themo-logger that can hold 9 probes. Because you need the data to be recorded to determine stability and uniformity. If you include a separate recorder or logger, it should also have the capability to record.
Best regards,
Edwin
Jonathan Apperley
Thank you for this wonderfully comprehensive thermocouple calibration guide
edsponce
Hi Jonathan,
You are welcome.
Appreciate the time reading my post.
Edwin
Brandin
Can you provide a measurement uncertainty budget for each of these calibration methods?
edsponce
Hi Brandin,
For the uncertainty budget of thermocouples, these are my recommendations:
1. Repeatability
2. Resolution of the UUT indicator
3. Resolution of the Standard Indicator
4. Uncertainty results from calibration certificate of the standard used
5. Drift of the standard used
6. Accuracy of the thermocouple (UUT)
If you will use the metrology well as the Standard, include below:
1. Stability of the well
2. Uniformity of the well
3. Axial inhomogeneity
4. Radial Inhomogeneity
Before implementing, make sure to verify or validate the methods with the uncertainty budgets.
I hope this helps,
Edwin